Creating an Automation: Deactivating a Queue When Ticket Count Exceeds 100
In this guide, we will walk through creating an automation that deactivates a queue when the number of generated tickets exceeds 100. Follow these steps to build and configure your automation.
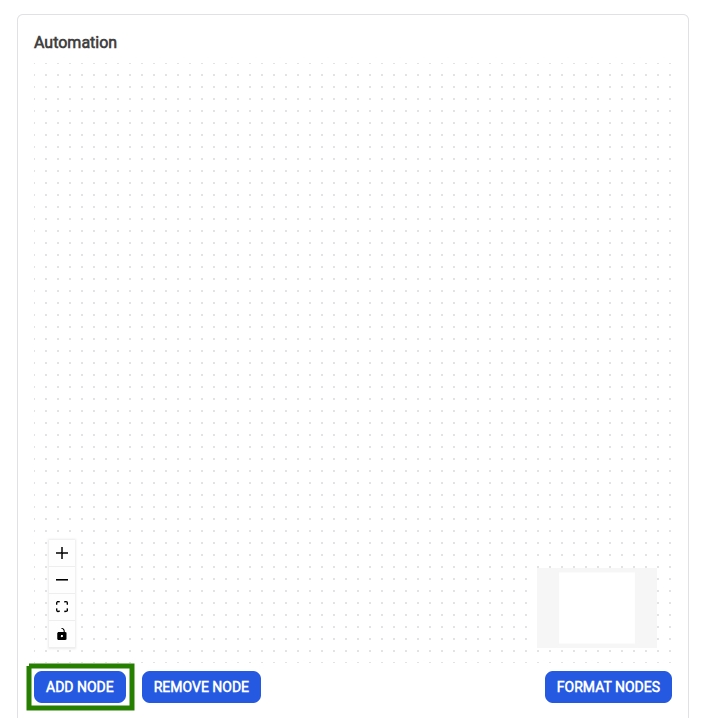
1. Add a Node for Event
First, click the Add Node button to add a new node to your automation flow.
2. Select the Node Type
Once you add a new node, it will appear in the automation area. Click the node to keep it selected, and then choose Event as the node type.

3. Select Event Type
After selecting the Event node, a menu will appear to choose the event type. For this example, we will select On Ticket Generated to trigger the automation when a new ticket is created.
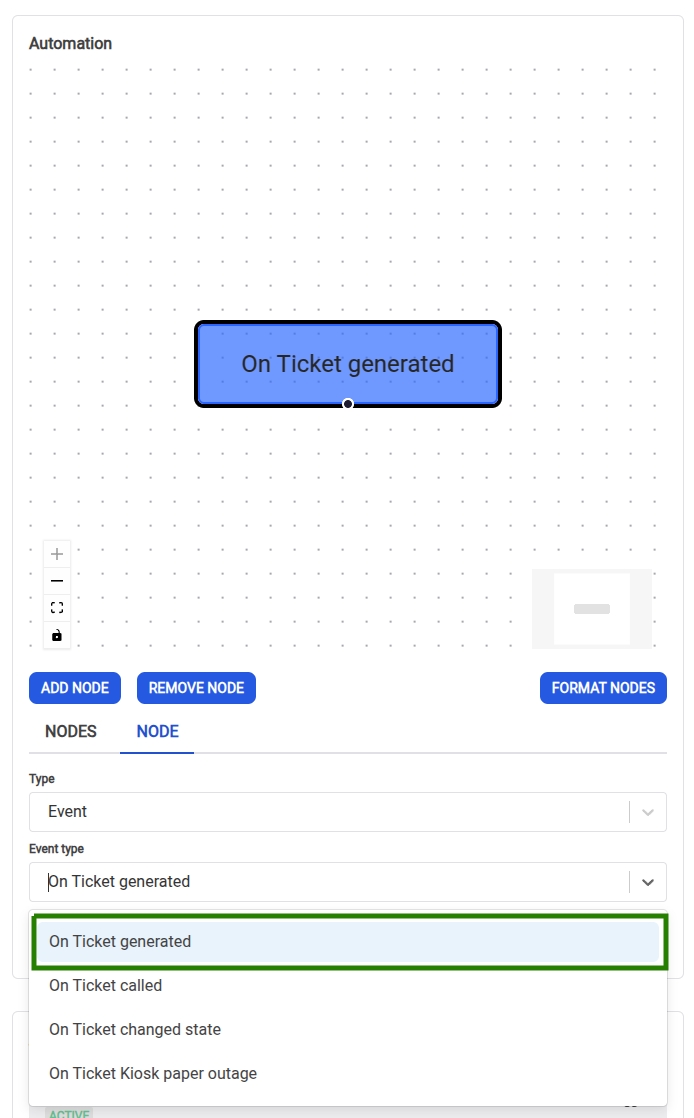
At this stage, we have defined the Event that will trigger our automation.
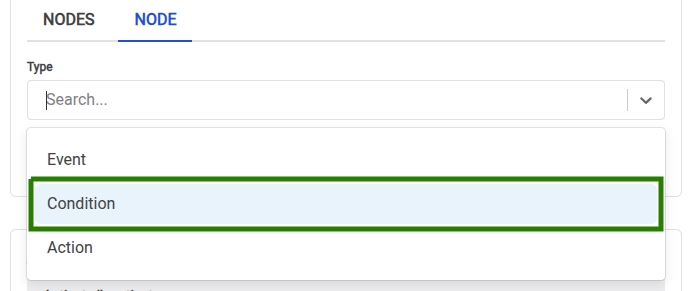
4. Add a Node for Condition
Next, we need to define the condition for our automation. To do this, create another node by clicking Add Node again, then choose Condition as the node type.
5. Configure Condition Fields
In this step, you will need to fill out the condition fields to specify what will be evaluated. Here’s how you can configure it:
- Field Type: Select the type of field to be evaluated. In this case, we are dealing with the number of tickets, so choose Int (Integer).
- Attribute: Select the attribute of the resource associated with the event. For this example, we will choose the number attribute, which refers to the number of generated tickets. For a full list of available ticket attributes, refer to the Attribute Reference Guide.
- Relation: Choose how the condition will be evaluated. We want the condition to trigger when the number of tickets exceeds 100, so select Greater Than.
- Value: Enter the value used for evaluation. In this case, set it to 100.

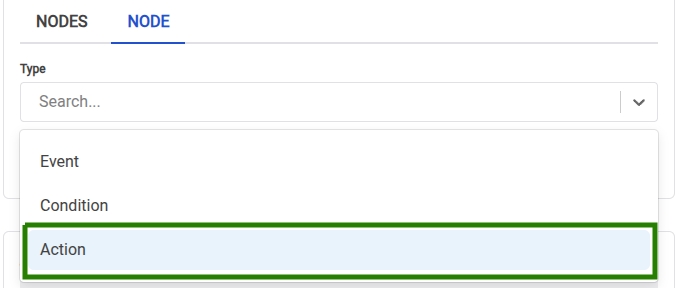
6. Add a Node for Action
Now, we will create the final node to define the action that should be performed when the condition is met. Click Add Node once again and choose Action as the node type.
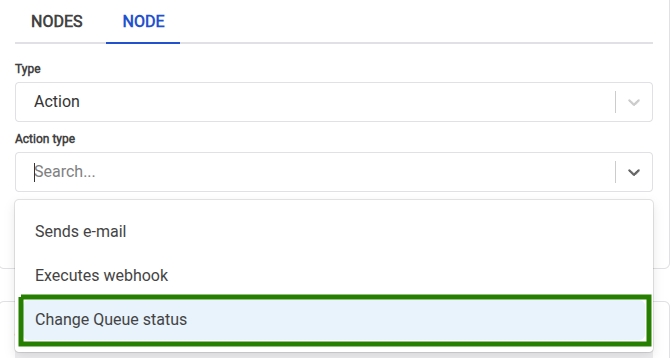
7. Select Action Type
After selecting the Action node, a new menu will appear. For this example, we will choose Change Queue Status as the action type, which will update the status of the queue when the condition is met.
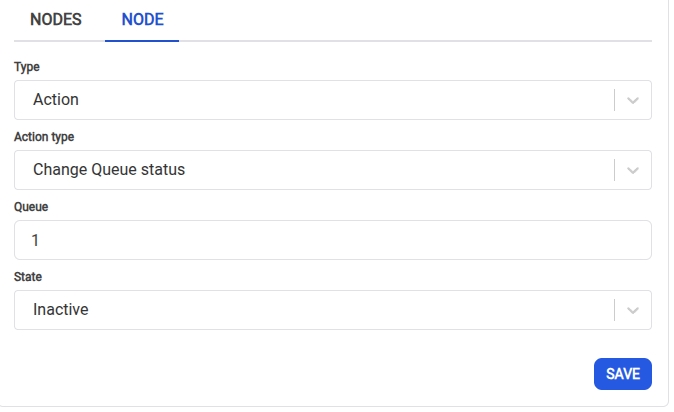
8. Configure Action Fields
Now, fill in the required fields for the action:
- Queue ID: Enter the ID of the queue that you want to deactivate.
- Status: Select the desired status for the queue (e.g., "Inactive" or "Deactivated").
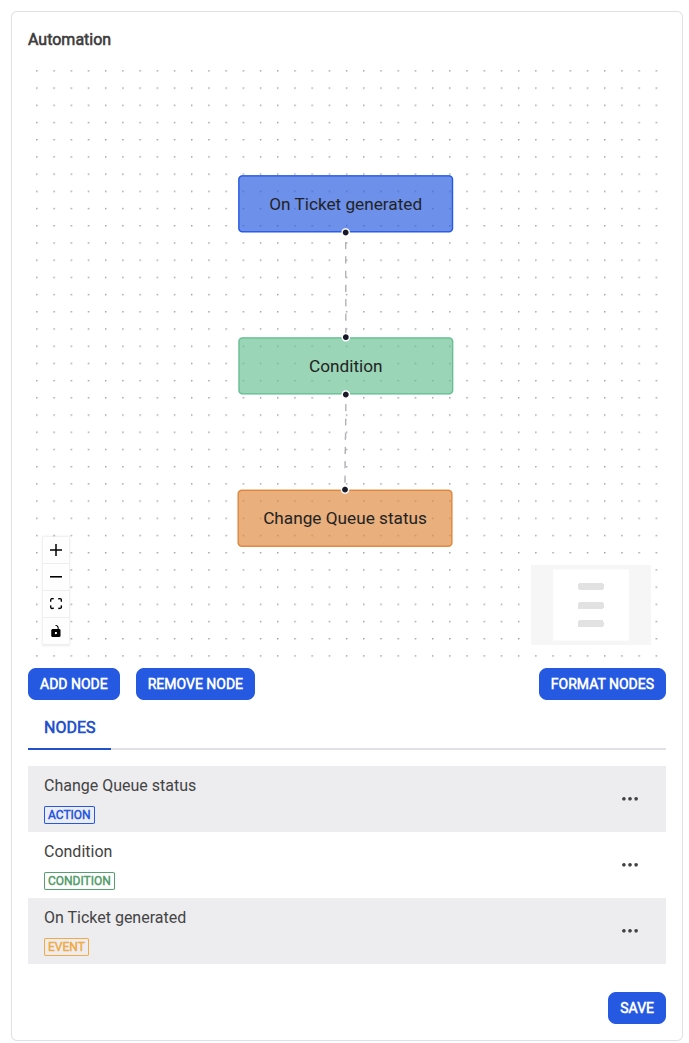
9. Connect Nodes
The final step is to connect the nodes to define the flow of the automation.
- Click on the point at the bottom of the Event Node (“On Ticket Generated”) and drag the connection to the Condition Node.
- Similarly, click the bottom point of the Condition Node and connect it to the Action Node (“Change Queue Status”).
Once all nodes are connected, your automation should look like this:
Conclusion
You have now created an automation that deactivates a queue when the number of generated tickets exceeds 100. This automation will help ensure that the queue is only active when necessary, improving efficiency and managing system resources better.